CORNICE FIXING INSRUCTIONS
- Make sure all contact surfaces are sound, clean
and free from grease.
- Wall and ceiling paper must be removed and paint
roughed up to provide a good key.
- To position the cornice correctly it is helpful
to have pencil guidelines around the walls and ceiling,
to the dimensions indicated in the brochure (making
adjustments for uneven plastered ceilings and walls).
- Fix nails in the wall at 600mm at the cornice
wall depth as a temporary support for the cornice.
Repeat this all round the room.
- The cornice is fixed with adhesive and for added
security screwed using rust proof screws to the
wall and to ceiling joists. The ceiling joists can
easily be located by probing with a nail inside
the ceiling guideline where marks would eventually
be hidden by the cornice. The joist positions can
be marked in pencil outside the guidelines for ease
of location when actually fixing the cornice.
- Commence fixing of cornice at an internal corner
and ideally with a patterned cornice you should
choose the one that is least seen when entering
the room, because this mitre will be less noticeable
if a pattern match cornice is used. Having mitred
the ends that form the corner spread a continuous
layer of adhesive on both edges of the cornice where
they will be in contact with the walls and ceiling.
Then supported on the nails press on the cornice
edges and squeeze the cornice into the angle between
the wall and ceiling as tightly as possible and
fix nails into the ceiling to temporarily support
the cornice.
- Check that the cornice is sitting correctly according
to the dimensions and adjust nails accodingly. It
is very important to accurately align cornice joints
prior to screwing and before the adhesive sets.
- Fix to the wall and ceiling using rust proof screws
(never rely on the adhesive alone to fix the cornice)
- The excess adhesive squeezed from the horizontal
joints between the wall and the ceiling should be
removed with a filling knife and the joints made
good.
- The vertical gaps at joints, angles and mitred
ends should be filled with casting plaster as follows:
- Mix a small quantity (if you mix it too thick
you will waste more than you use) of casting plaster
in water to a milky consistency. Thoroughly brush
the cornice joints with a wet paintbrush, then fill
the joint with plaster. Clean off excess material
from the joint with a plasterer's small tool or
filling knife, then brush away loose material. (Dentil
block and other mouldings can be sculpted since
the casting plaster sets very quickly).
- Any splashes of adhesive on the wall, ceiling
or cornice face should be washed off immediately.
- When dry (usually about 24 hours under normal
conditions) the cornice can be painted.
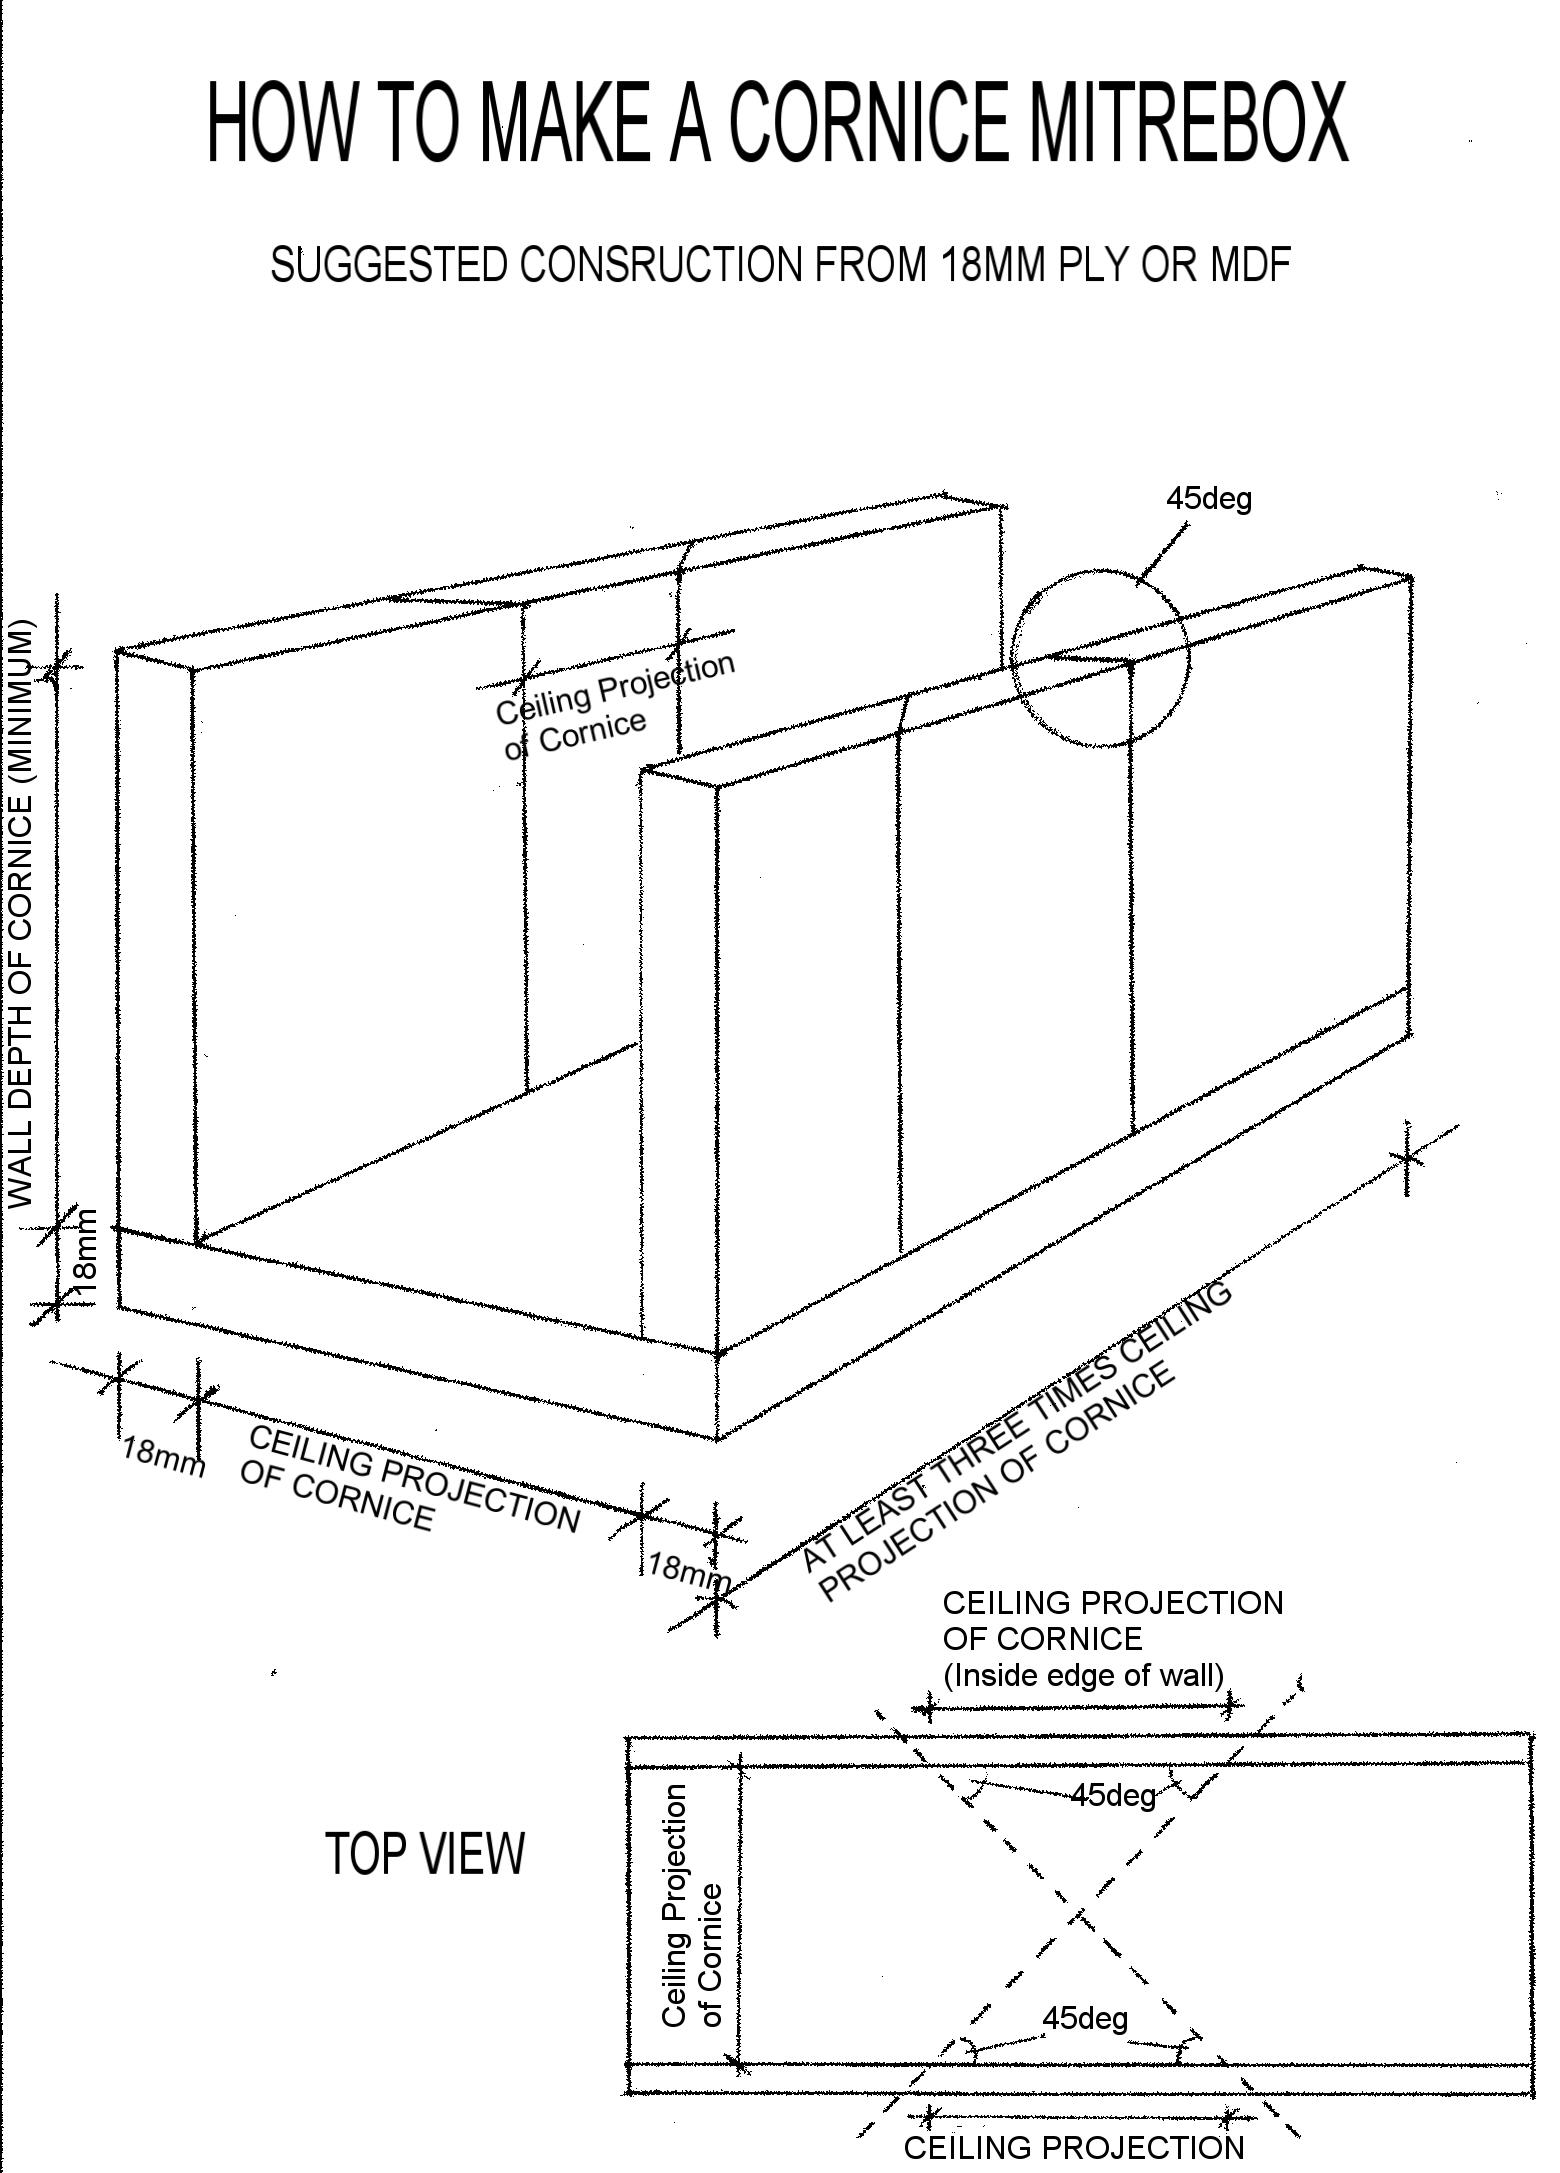
CUTTING A MITRE
- Place the cornice upside down in the mitre block
with the wall edge uppermost flat against the side
and the ceiling edge flat against the base.
- Fix small battens (not necessary if you make your
mitrebox as below) to the mitre box base set away
from the upright the ceiling projection dimension
shown in the brochure, to ensure 45 degree cut.
- Cut the mitres with a fine toothed saw. Any inaccuracies
are made good when the joint is filled.
|